What a long press image is
A long press image is prepared so that a normal feed view and a more deliberate interaction can feel different. The viewer first sees a controlled visible state, then discovers a fuller image after pressing, expanding, or opening it. The file itself is a PNG, not a video or animation.
The effect depends on transparency, composition, preview surfaces, and platform rendering. RevealStudio controls the local mask and alpha values. X still controls resizing, compression, crops, backgrounds, and device-specific behavior, so a test post remains part of a reliable workflow.
Pick one reveal that reads quickly
Choose a payoff that can be understood at feed size: an alternate expression, hidden character, meme punchline, spoiler, product detail, code, or before-and-after state. Leave enough visible context for the first image to look intentional before anyone interacts.
Avoid relying on tiny text, thin edges, or a faint tonal change. Social compression can remove subtle differences. A larger hidden shape and one strong visual anchor usually create a clearer long press result than many small masked details.
Paint the hidden region
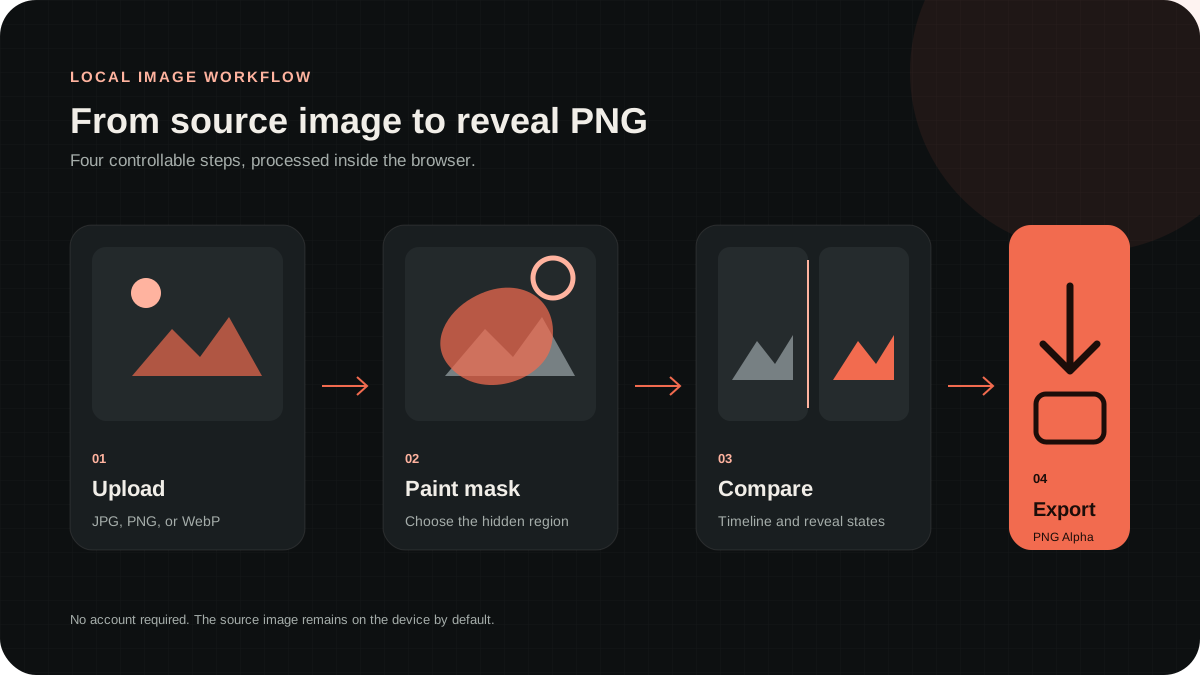
Upload a JPG, PNG, or WebP source and brush over the region that should become transparent. Use a larger brush for backgrounds and broad shapes. Reduce the size near faces, lettering, product edges, and interface details. Hardness controls whether the transition is crisp or soft.
Switch to the eraser to restore important pixels, use undo for recent strokes, and reset only when the full masking strategy needs to change. Reverse selection is useful when one small subject should remain visible and most of the unpainted canvas should be hidden.
Choose a preset and tune strength
Standard is the safest first test. Anime Reveal protects colorful line art, Glow Reveal emphasizes bright effects, and Dark Reveal suits shadow-heavy images. Templates set real Blur, Contrast, Saturation, and Reveal Strength values that remain editable.
Adjust Reveal Strength first because it directly controls the hidden region’s remaining opacity. Add contrast when the two states are too similar. Use blur sparingly around text and hard product edges, and change saturation only when platform compression weakens or exaggerates color.
Compare the two states before export
The timeline preview shows the prepared transparent version over a checkerboard. The reveal preview shows the complete processed source. Check the composition at a normal social size. The first state should remain coherent, and the second should provide a visible payoff.
If the timeline state appears broken, erase part of the mask or preserve a stronger subject. If the difference is difficult to see, increase strength, simplify the hidden area, or add contrast. The preview helps catch local design problems but cannot reproduce every X rendering decision.
Export PNG without losing alpha
Generate the result and confirm the dimensions, PNG format, approximate size, and alpha status. Download reveal-output.png directly from the browser and keep it as the master. JPG cannot store transparency, and some messaging or scheduling apps flatten alpha during transfer.
Move the image as an original file when possible and test it in a low-risk X post. Check mobile and desktop if the reveal is important to a launch. Keep a normal static image ready for essential information because external platform behavior can change.
Use a clear interaction caption
A short instruction is enough: “long press to reveal,” “press the image for the second version,” or “hold to see what changed.” Add a spoiler warning or one product CTA when needed. The caption should describe the real payoff instead of using vague engagement bait.
RevealStudio processes the image locally and records only minimal anonymous product events. It does not include source pixels, file names, accounts, emails, or user-entered copy in analytics events.