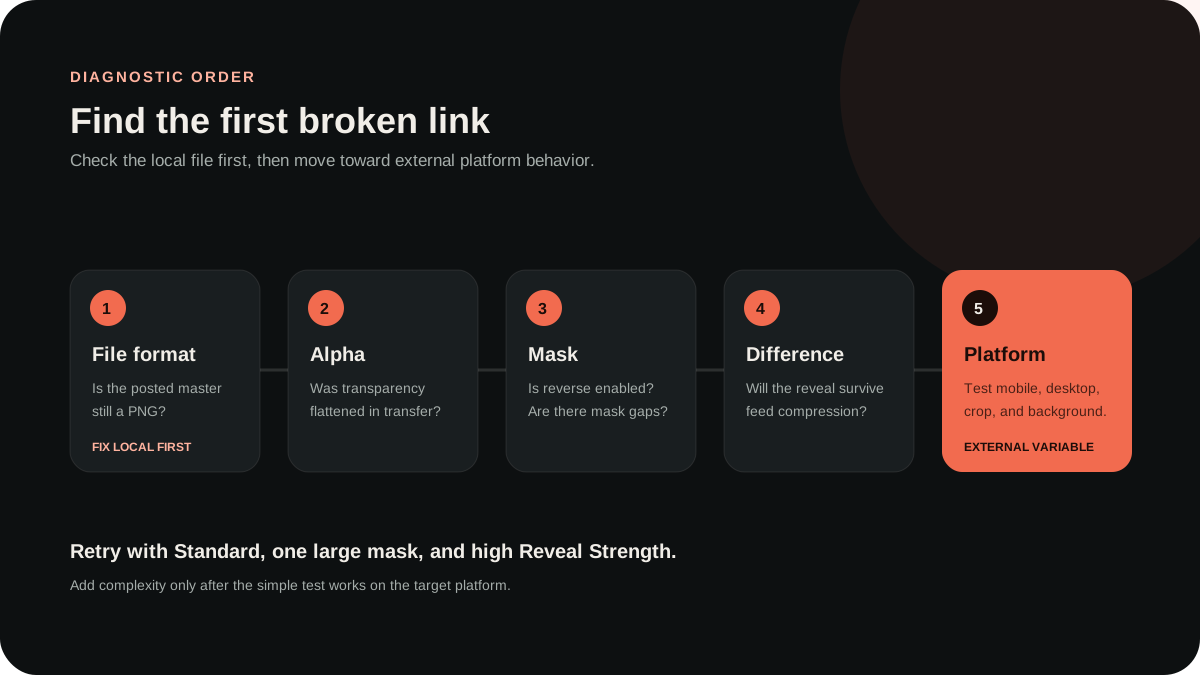
Start with the controllable file
RevealStudio prepares one transparent PNG in the browser. Keep the downloaded reveal-output.png as the master and avoid any app that converts it to JPG or fills transparent pixels with a solid background. A correct source file is the foundation for every later troubleshooting step.
If the post does not reveal as expected, return to the master instead of repeatedly downloading or editing the version processed by X. The platform copy may have different compression and pixel data.
Use a simple first test
Choose Standard, paint one large meaningful region, use strong Reveal Strength, and export directly. This removes most variables. Once the simple image works, add a softer edge, another template, contrast, saturation, or a more detailed mask.
A controlled test is faster than changing several parameters together. Keep each generated master so you can identify which change improved or weakened the result.
Treat the preview as guidance
The timeline and reveal panels use the same local image state as export, but they do not reproduce X compression, crop, background, device theme, or future rendering changes. They are designed to catch composition and masking problems before upload.
For an important campaign, test the file on the platform and keep a normal static image ready. Essential information should also exist in the post text or destination page.
Get more specific help
Use the step-by-step guide when you are building the first image, the troubleshooting guide when an exported PNG fails, and the template pages when the source is anime art or a product launch. Every help route links back to the same local editor.