Make transparency with a manual mask
RevealStudio turns selected image regions into transparent or partly transparent pixels. Upload a JPG, PNG, or WebP source, paint the area you want to change, and export a new PNG with an alpha channel. Manual masking gives you direct control over what stays visible instead of guessing which object is the background.
This workflow is useful for reveal images, spoiler masks, product cutouts, controlled overlays, and social experiments. It is not automatic background removal. You decide exactly which pixels belong to the transparent region and can correct the boundary with an eraser before export.
Why PNG supports transparency and JPG does not
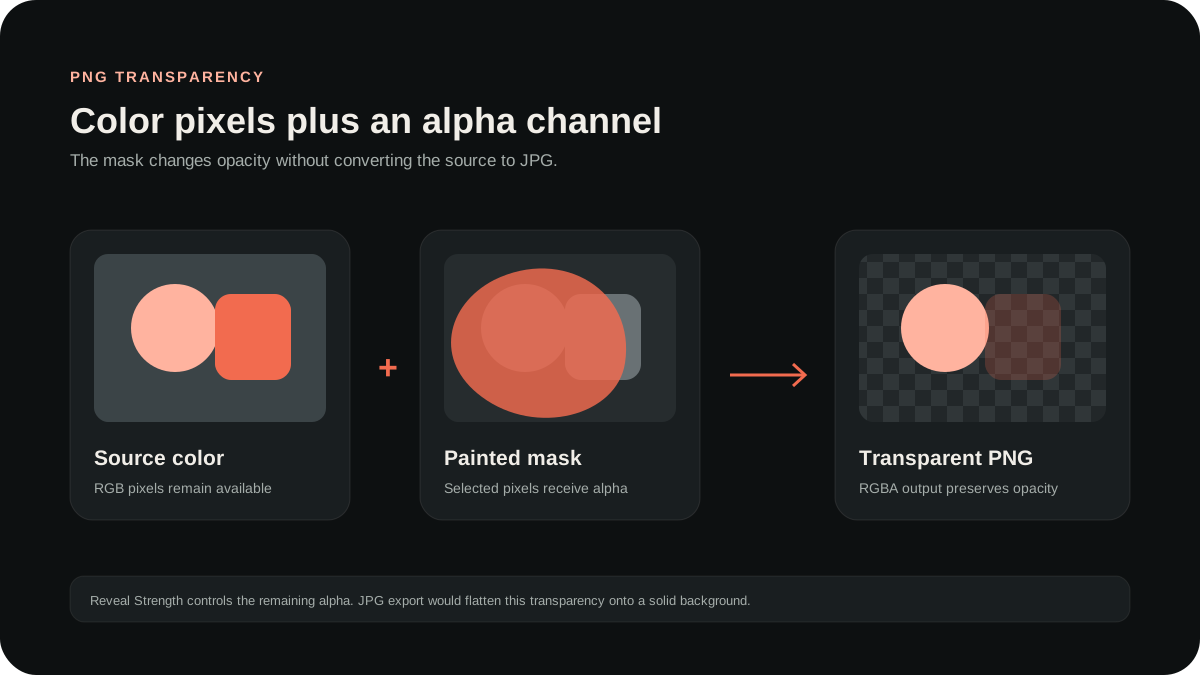
PNG can store an alpha value with each pixel. Alpha represents opacity, from fully visible through partly transparent to fully transparent. RevealStudio changes those alpha values inside the mask while preserving the source color data and image proportions at the working resolution.
JPG stores color information but does not support an alpha channel. If a transparent PNG is converted to JPG, the transparent area must be filled with a solid color. That is why reveal-output.png should remain PNG through editing, transfer, scheduling, and publishing.
Select the region with brush and hardness
Use a large brush for open backgrounds and broad shapes. Reduce the brush near hair, text, faces, product edges, and interface details. Hardness controls whether the edge is clean or gradual. Use high hardness for logos and graphics, and softer edges for lighting, fabric, smoke, or painted textures.
Switch to the eraser when the mask crosses an area that should remain opaque. Undo restores recent mask steps, while reset removes the entire mask. Reverse selection is useful when you want to keep one small subject and make the larger unpainted area transparent.
Control partial and full transparency
Reveal Strength determines how much the mask reduces opacity. Full strength makes selected pixels completely transparent. Lower strength keeps a faint version of the source, which can help with soft overlays or restrained reveal experiments. Use the timeline preview to see the actual transparent state against a checkerboard.
Blur, Contrast, and Saturation affect the processed image before export. These controls can help social reveal images survive compression, but they are optional for a basic transparent PNG. Start with Standard and adjust only what the source needs.
Refine the edge for the intended use
A social reveal can tolerate a broader visual mask because the viewer first sees it at feed size. A product overlay or design asset may need a cleaner edge. Inspect important boundaries, erase accidental coverage, and compare the result against both the checkerboard and the complete preview.
Soft edges contain partly transparent pixels. They can look natural over similar backgrounds but may create a halo over very different colors. Hard edges avoid halos but can look cut out. Choose the transition based on where the PNG will be displayed rather than using one setting for every source.
Generate and verify the exported file
Select Generate Result to create the PNG. RevealStudio reports the output dimensions, approximate file size, PNG format, and alpha status. Downloading saves reveal-output.png directly from the browser. The source image and mask stay on the device by default.
Open the downloaded file in a viewer that shows transparency over a checkerboard or colored background. If the transparent area appears permanently filled, another app may have flattened it. Return to the original download or export again without passing the file through that app.
Keep transparency through transfer and publishing
Send the PNG as an original file when moving it between devices. Messaging apps often compress photos and may remove alpha. Social schedulers, optimizers, and design tools can also flatten transparency, so test the complete publishing path before relying on it for a launch.
For X reveal posts, pair the file with a short instruction and test on a low-risk post. Platform rendering can change across mobile, desktop, themes, and future updates. RevealStudio prepares a valid local PNG, while the platform determines the final preview surface.