Create a spoiler image without hiding the setup
A useful spoiler image leaves enough visible information for people to understand the topic while protecting the actual payoff. Keep the episode, game, match, character, product, or meme setup readable. Hide the twist, final score, alternate panel, answer, or reveal that changes the meaning of the visible state.
If the first state is empty, viewers may think the image failed to load. If it shows too much, the warning no longer protects them. Plan the two states before masking and ask whether someone can make an informed choice about pressing the image without already seeing the spoiler.
Choose a source that works at feed size
Use one strong subject and clear contrast. Small subtitles, thin interface labels, and subtle background changes can disappear when X resizes or compresses the post. Crop the source so the visible context and hidden payoff both remain legible on a phone without zooming.
Keep essential warning context away from the image edges because timeline crops can vary. If the spoiler is text, use a short line in a readable size. If it is a visual detail, make the masked region large enough to create an obvious difference after expansion.
Paint a controlled spoiler mask
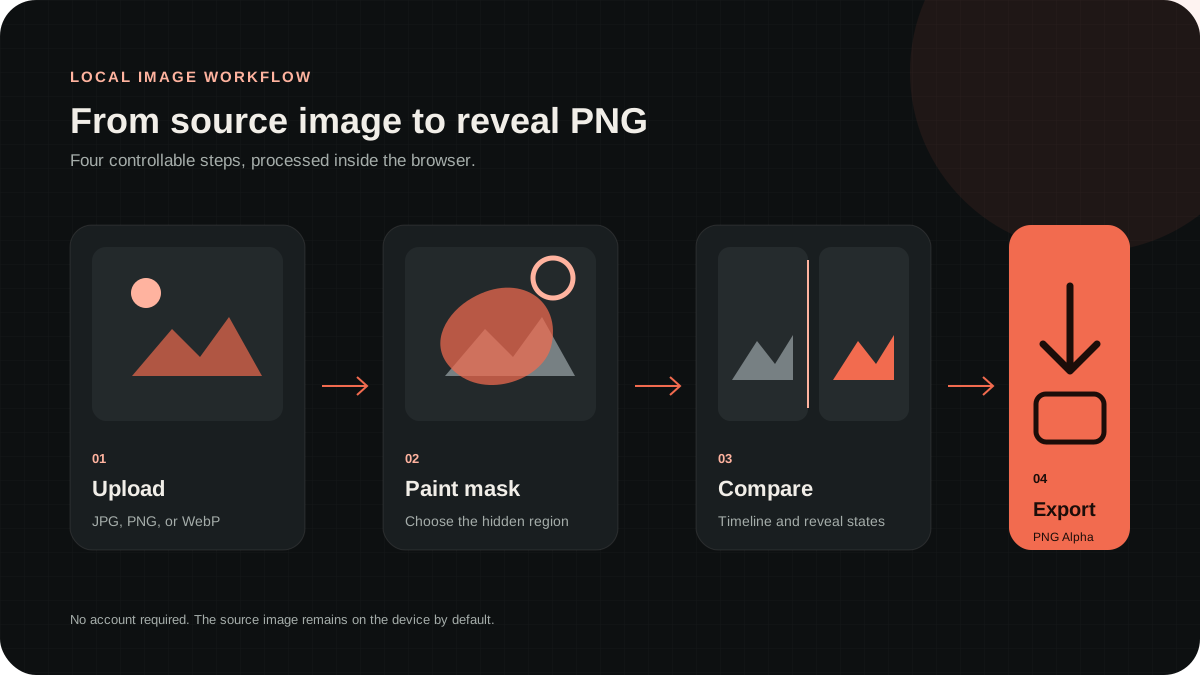
Upload a JPG, PNG, or WebP file and use the brush to cover the spoiler region. Increase brush size for broad panels or backgrounds. Reduce it around faces, captions, scoreboards, and object edges. High hardness creates a clean boundary for text and graphics, while softer edges suit lighting, hair, and illustration.
Use the eraser to restore context that was covered by mistake. Undo keeps recent masking actions available. When only one small region should remain visible, paint that region and enable reverse selection instead of covering the entire canvas manually.
Set reveal strength before adding filters
Reveal Strength controls how much transparency is applied to the masked region. Start high for spoilers because an accidental partial reveal can defeat the warning. If the timeline state looks broken, restore some visible context with the eraser instead of immediately lowering the strength.
Use Contrast when the visible and hidden states remain too similar after compression. Blur can soften a photographic or illustrated boundary, but it should not make warning text unreadable. Saturation can separate colorful art or reduce distracting tones. Change one parameter at a time and compare both previews.
Preview both states as a viewer
The timeline preview represents the transparent version a person may encounter first. The reveal preview shows the complete processed image. Check that the first state communicates the topic and warning, while the second state delivers the expected spoiler without unrelated visual changes.
View the panels at their normal size. A mask that looks precise while zoomed in may still be unclear in the feed. If the payoff remains visible, enlarge or strengthen the mask. If the setup disappears, erase part of the mask and preserve a stronger visual anchor.
Export the original PNG
Generate the result and confirm that the editor reports PNG with Alpha. Download reveal-output.png directly from the browser and keep it as the master file. Do not convert it to JPG because JPG removes transparency. Some messaging and scheduling tools can also flatten alpha during transfer.
RevealStudio processes the source, mask, previews, and export locally with Canvas. The original image is not uploaded to an image-processing server by default. This is useful for unreleased episodes, private fandom art, campaign drafts, and other material that should remain on the creator’s device.
Write a spoiler-safe caption
Name the subject before asking people to interact. A useful pattern is “Finale spoiler, long press only if you have watched it” or “Match result hidden, tap and hold to reveal.” This gives viewers a real choice and makes the format understandable without explaining alpha transparency.
Do not hide safety information, required disclosures, or misleading claims behind the interaction. For important posts, test the image on a low-risk account and check more than one device. X controls final compression, crop, background, and preview behavior, so local preparation cannot guarantee every platform result.